
Prime Dome Construction: Difference between revisions
→Song: exits |
No edit summary |
||
| (24 intermediate revisions by 2 users not shown) | |||
| Line 1: | Line 1: | ||
=Length Table= | =Diagram= | ||
[[Image:6vdiagram_toorcamp_colors.png|600px|alt="toorcamp colors"]] | |||
=Source= | |||
<gallery> | |||
Image: 6vdiagram_toorcamp_colors.png | |||
Image: 6vdiagram.gif | |||
</gallery> | |||
https://www.desertdomes.com/rev6calc.html | |||
= Dome Size = | |||
Side 26.916 29.916 | |||
Height 23.30993977 26.30993977 | |||
=Tools= | |||
[[QM]] Topload load last first off, keep track of tools: | |||
* Safety glasses | |||
* ear plugs | |||
* gloves | |||
* impact to socket adapters (3/8in mostly) x4 (we break a few each year) | |||
* angle grinder | |||
* cut off wheels | |||
* 150ft of extension cable for angle grinder | |||
* 2 impact drivers, | |||
* 4 chargers, | |||
* 6 batteries(previously 2ah but bigger are mote available now) | |||
* sockets 3 correct size socket 5/8in with 3/8th impact adapter . | |||
* 2 channel lock style pliers big enough to grab wing nuts. (grabbers) | |||
* vice grips | |||
===Head Bonkers=== | |||
Bonkers: 8ft (and 5ft) 2x4s with cleats made with 2x4s with 45 degree angle to prop up the dome to make it so people don't have to hold it all the time. These can fall and could bonk someone if it is not being held, ensure it does not fall on people. Ensure correct length screws were used, or it will have a screw point poke out and hurt someone Bonkers also can move the whole dome causing it to collapse on the last two levels. Make sure they are near vertical. | |||
Bonkers should be inspected for cracking, longer cleats may help keep host from cracking. | |||
Short bonkers of about 5ft length with cleats on each side staggered to get a range of lengths are great for before and after the work site, as people work there and they hold up the bottom layer. | |||
==member construction== | |||
Drill bit drill cuttoff wheel, measuring tape, press to squish the member ends flat, flap disk or grinder to deburr. | |||
EMT metal pipe, check size | |||
===Length Table=== | |||
A Yellow 3.958 47.496 | A Yellow 3.958 47.496 | ||
| Line 13: | Line 56: | ||
H Pink 5.243 62.916 | H Pink 5.243 62.916 | ||
I Brown 5.274 63.288 | I Brown 5.274 63.288 | ||
==bolt specification: == | |||
5/8 head (16mm). no more than .25in shoulder | |||
2.5in seems fine. 3.5in is about as long as we would ever want them 2in is about as short | |||
==Joints == | |||
The impact driver clamps the emt by using the bolt, wingnut and washer. | |||
Before we had wingnuts we needed deep sockets. With wingnuts vice grips are great. | |||
= | ==Tarp notes== | ||
It is not a flat sheet. There is a hole at the top of the dome. the 5 large triangles go up, then the trapezoids go big side up in the back and then the 2 thinner trapezoids go on the side, a triangle goes in the far rear behind the stage. | |||
=Labor= | |||
A small crew of 3 is normally dedicated to this task. We can expand to 4 on layer 7 and 7 for a portion of layer 9. | |||
= | It normally takes about 2 days. | ||
==Roles== | |||
* Impactor on the inside or outside, holds and lifts a bit then has the impact wrench | |||
* pole stroker /prepper this person is on the outside and hands poles to the nut holder this person may also help lift. | |||
* Nut jiggler /holder -- this person holds the wing nut with a pair of gloves or channel lock pliars, also keeps things together when a bolt is unlock. | |||
*Pattern Layer, when just 3 people everybody does this laying out a color. we found that laying out one layer at a time is better | |||
* Head Bonker/ coordinates movement of Lifter, 1 or 2, holds the dome up with bonkers. | |||
It is easier to connect pieces at waste height. so pattern layer will loosly get bolt on a step ahead of the snuggers while there is slack, and then the lifters can align and pull things together at waste height, then weight can also go on the new member right away allowing easier lifting. | |||
Test that the poles swing to the correct location before unscrewing the bolt on the existing layer. this is to avoid moving/adjusting/stretching the dome while it is unbolted. | |||
members can have a lot of tension or compression and may move unexpectedly when the bolt is undone. --So avoid yanking and extra pulling while a section is unbolted. (especially when layer is under 3/4 done) | |||
We order the members so that when we disconnect things the lower ones can come off first. | We order the members so that when we disconnect things the lower ones can come off first. | ||
| Line 56: | Line 99: | ||
=Safety= | =Safety= | ||
This may not be a complete list. | This may not be a complete list. | ||
*Ask questions, see something say something. | * Ask questions, see something say something. | ||
* We have deburred conduit, but there may still be sharp things. | * We have deburred conduit, but there may still be sharp things. | ||
| Line 62: | Line 105: | ||
* Team lift, communication and coordination of the team is important. | * Team lift, communication and coordination of the team is important. | ||
* Closed toe shoes recommended | * Closed toe shoes recommended | ||
* safety glasses are required. | * safety glasses are required. There are a lot of metal shavings that fly from using the impact driver | ||
* The members are sharp and sometimes shear like scisors. | |||
* rough housing is not allowed. | * rough housing is not allowed. | ||
* The bonkers are called bonkers because when the dome moves they fall and could bonk someone on the head. Arrange them so that the cleat is facing down so the 2x4 rests on the member. | |||
* hearing protection is required when impacting. Impact drivers are very loud. It is important to have earplugs on strings because they get removed and put back a lot. Communication is easier without | * hearing protection is required when impacting. Impact drivers are very loud. It is important to have earplugs on strings because they get removed and put back a lot. Communication is easier without | ||
* Do not put yourself under a part of the dome that is propped up. | * Do not put yourself under a part of the dome that is propped up. [[image:Dome_Proped_up_side_do_not_walk_under.jpg|200px|alt="no walk"]] | ||
*Take frequent breaks. | *Take frequent breaks. | ||
* You may want to wear gloves. | * You may want to wear gloves. | ||
| Line 77: | Line 121: | ||
==Techniques,== | ==Techniques, Flow == | ||
We start at the top and do a layer at a time. | We start at the top and do a layer at a time. | ||
We leave the layer finger tight that is being attached to, and impact before it gets too high. | We leave the layer finger tight that is being attached to, and impact before it gets too high. | ||
Starting uphill vs downhill, the dome moves downhill naturally, and possibly in the direction that the bonkers are leaning it to. | |||
The dome also rotates a bit as we lift, so to get the sage at the lowest spot one may have to adjust the dome at the end. | |||
Try not to layout the pattern more than one level ahead.(in a way that confuses the lifters) | Try not to layout the pattern more than one level ahead.(in a way that confuses the lifters) | ||
the top 5pt yellow star is easy, after the black pentagon, lifting up the side you are working on become important. unbolt one of the bolts that was on the ground. have 3 links together to make a triangle with a new base and two verticals. don't leave a single pole buried into the ground | |||
As they dome gets heavier, we have to prop up a side of the dome to be able to attach the next layer. | As they dome gets heavier, we have to prop up a side of the dome to be able to attach the next layer. | ||
complete Triangles on the base can be used as a support. do not leave a single stick dangling down. | complete Triangles on the base can be used as a support. do not leave a single stick dangling down. (they dig into the ground, and jerking them out of the ground is unpleasant) | ||
Starting a layer means tipping the dome., prop up desired side about a foot, then extend both sides a foot, then the middle another foot, then the sides another foot then the starting point will be about 3ft up and verify everything is supported. | Starting a layer means tipping the dome., prop up desired side about a foot, then extend both sides a foot, then the middle another foot, then the sides another foot then the starting point will be about 3ft up and verify everything is supported. | ||
If the holes do not line up, the dome is warped (or wrong members) do not yank on members when nut is removed. | If the holes do not line up, the dome is warped (or wrong members) do not yank on members when nut is removed. | ||
It is difficult to run the impact driver on the ground. connect one link ahead. two ahead may be ok if there are extra workers, but it gets hard to move. Connecting one ahead allows the nut holder to drag both poles and verify geometry. | |||
bundling: The pole prepper sets up a bolt vertex to give to the nut jigglers. They connect it to the horizontal member that is ahead of work. The order that we place the layers on the bolt matters, The higher members go towards the bolt head, and the ones that go lower go towards the wingnut. We may stack all of the members at a joint going to the right or left, and it may appear out of order. | |||
The person at the joint is the one that can push and pull and call for other people to move things. get positive consent from that person before moving things, and be sure you understand what they mean before you jerk. | |||
==Management techniques== | ==Management techniques== | ||
| Line 120: | Line 176: | ||
Fire extinguishers | Fire extinguishers | ||
exit signs | exit signs | ||
==Last layer== | ==Last layer== | ||
| Line 143: | Line 194: | ||
Christmas in Ukraine | Christmas in Ukraine | ||
Brown | Brown asterisk surrounded by pink sphincter, with silver flower star. with orange leaves. with brown extending to orange. surrounded by a black hexagon. | ||
Black forms the super structure, large 2 member pentagon around the red flower, and a large hex, each side 2 members long. The pattern always has two blacks in line. | |||
at the black intersections Two orange three black one green. | |||
Halloween meets christmas | |||
=Tarps= | =Tarps= | ||
| Line 159: | Line 210: | ||
The entrance is across from the stage, and is pointed to by one of the points on the top pentagram. there are a few exposed members around the door to provide sightlines to others. | The entrance is across from the stage, and is pointed to by one of the points on the top pentagram. there are a few exposed members around the door to provide sightlines to others. | ||
the brown sphincter is a possible main entrance: an entrance. the stage is centered on a yellow star. | |||
Please make sure the yellow star is on the lowest end of the slope so that the stage can be level and the same height from the ground | |||
There are two triangles cut for emergency exit. | There are two triangles cut for emergency exit. | ||
There is a year where the stage is centered on the brown, and the entrance is cut below a yellow star. | |||
In 2024 things led to 2 main entrances and 2 front side exits. | |||
=Stage placement= | |||
It is nice to have the stairs on the same side as the sound booth, but it makes space tight if there is a videographer | |||
It would be nice to have 2 sets of stairs. | |||
If there is a slope, the stage should be at the base of the slope, however sun angles may also be a factor. | |||
=Securement= | =Securement= | ||
Don't secure until dome is in place and all bottom bolts are tight. | Don't secure until dome is in place and all bottom bolts are tight. | ||
there will be a ring all around the base. that can be a tension band. | there will be a ring all around the base. that can be a tension band. | ||
The matts over the entrance beams can do a lot to hold things down. use stakes in a way that does not trip people. | |||
the orange twist screws can sometimes help, they often screw into the ground near the middle of the member, and use ratchet straps to connect to the intersection. | |||
Often times these don't hold, try another place. | |||
==layers== | |||
9 layers | |||
layers 8 needs 4 or more and 9 should have 6 or more people | |||
==Orientation== | |||
Land must be quite flat. Level is also important. Stage should be on the lower end or upper end. Stage is intended to be infront of the pentagon. | |||
==Deconstruction== | |||
have an angle grinder ready. | |||
layers 9 and 8 need a fair team to hold things up, but it can go quickly. you will reattach some bolts on the lower levels. use bonkers to hold things up. | |||
Keel walking area clear of tripping hazarfs | |||
==tests and ideas== | |||
It is confirmed that the shorter screws are easier to work with than the longer ones, just requires unwarping the dome. 2024 | |||
Using the stage as a support for the dome is not quite good enough. It is hard to move away when adjustment is needed, and there is tripping hazard. Make more bonkers. 2024 | |||
2026 idea: use cross member on a bonker to limit tipping. This is not guaranteed to be worth it. | |||
More opaque is good for tarps, a thin white tarp makesnit hard to see screens. | |||
Fly for outer TVs and shade structure for stage. | |||
The AV equipment should probably be used | |||
It is important to have the stage at the top or bottom of the slope. it makes it easier to make the stage. | |||
==Openings== | |||
2012 1 entrance | |||
2014 1 entrance | |||
2016 1 entrance 2 emergancy | |||
2018 | |||
2024 2 entrance 2 emergency | |||
2026 1 entrance 4 emergency | |||
[[Image:Fire marshall plan prime dome 2026 .png]] 4 triangles one hex. 5 total. | |||
4 entrance/exits -- it appeared to work. | |||
Latest revision as of 16:12, 23 June 2026
Diagram

Source

https://www.desertdomes.com/rev6calc.html
Dome Size
Side 26.916 29.916 Height 23.30993977 26.30993977
Tools
QM Topload load last first off, keep track of tools:
- Safety glasses
- ear plugs
- gloves
- impact to socket adapters (3/8in mostly) x4 (we break a few each year)
- angle grinder
- cut off wheels
- 150ft of extension cable for angle grinder
- 2 impact drivers,
- 4 chargers,
- 6 batteries(previously 2ah but bigger are mote available now)
- sockets 3 correct size socket 5/8in with 3/8th impact adapter .
- 2 channel lock style pliers big enough to grab wing nuts. (grabbers)
- vice grips
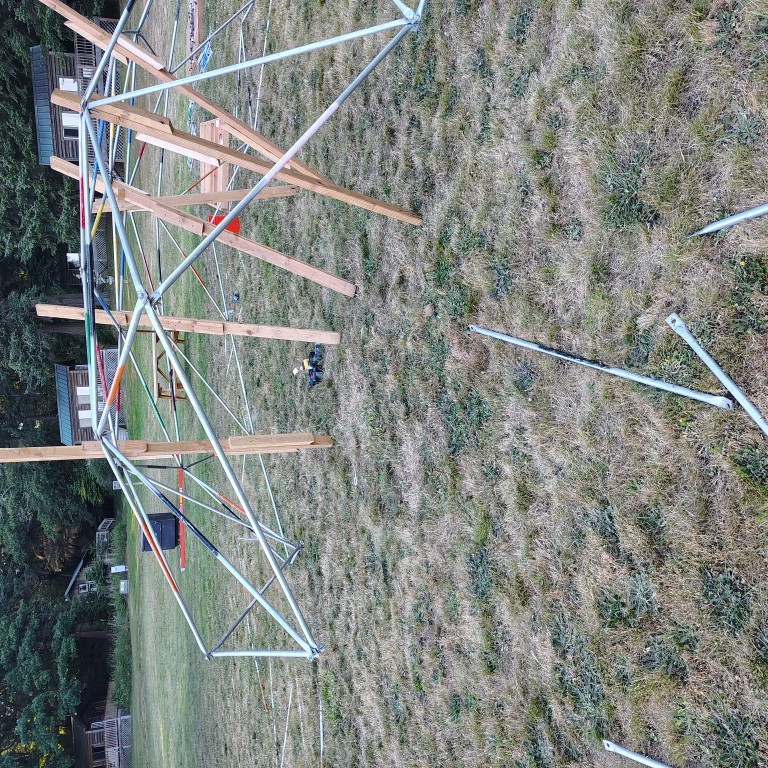
Head Bonkers
Bonkers: 8ft (and 5ft) 2x4s with cleats made with 2x4s with 45 degree angle to prop up the dome to make it so people don't have to hold it all the time. These can fall and could bonk someone if it is not being held, ensure it does not fall on people. Ensure correct length screws were used, or it will have a screw point poke out and hurt someone Bonkers also can move the whole dome causing it to collapse on the last two levels. Make sure they are near vertical.
Bonkers should be inspected for cracking, longer cleats may help keep host from cracking.
Short bonkers of about 5ft length with cleats on each side staggered to get a range of lengths are great for before and after the work site, as people work there and they hold up the bottom layer.
member construction
Drill bit drill cuttoff wheel, measuring tape, press to squish the member ends flat, flap disk or grinder to deburr.
EMT metal pipe, check size
Length Table
A	Yellow	3.958	47.496
B	Blue	4.638	55.656
C	Red	4.429	53.148
D	Black	4.938	59.256
E	Green	4.562	54.744
F	Orange	4.821	57.852
G	Silver	5.013	60.156
H	Pink	5.243	62.916
I	Brown	5.274	63.288
bolt specification:
5/8 head (16mm). no more than .25in shoulder 2.5in seems fine. 3.5in is about as long as we would ever want them 2in is about as short
Joints
The impact driver clamps the emt by using the bolt, wingnut and washer. Before we had wingnuts we needed deep sockets. With wingnuts vice grips are great.
Tarp notes
It is not a flat sheet. There is a hole at the top of the dome. the 5 large triangles go up, then the trapezoids go big side up in the back and then the 2 thinner trapezoids go on the side, a triangle goes in the far rear behind the stage.
Labor
A small crew of 3 is normally dedicated to this task. We can expand to 4 on layer 7 and 7 for a portion of layer 9.
It normally takes about 2 days.
Roles
- Impactor on the inside or outside, holds and lifts a bit then has the impact wrench
- pole stroker /prepper this person is on the outside and hands poles to the nut holder this person may also help lift.
- Nut jiggler /holder -- this person holds the wing nut with a pair of gloves or channel lock pliars, also keeps things together when a bolt is unlock.
- Pattern Layer, when just 3 people everybody does this laying out a color. we found that laying out one layer at a time is better
- Head Bonker/ coordinates movement of Lifter, 1 or 2, holds the dome up with bonkers.
It is easier to connect pieces at waste height. so pattern layer will loosly get bolt on a step ahead of the snuggers while there is slack, and then the lifters can align and pull things together at waste height, then weight can also go on the new member right away allowing easier lifting.
Test that the poles swing to the correct location before unscrewing the bolt on the existing layer. this is to avoid moving/adjusting/stretching the dome while it is unbolted.
members can have a lot of tension or compression and may move unexpectedly when the bolt is undone. --So avoid yanking and extra pulling while a section is unbolted. (especially when layer is under 3/4 done)
We order the members so that when we disconnect things the lower ones can come off first. so when we are putting things up the bolt stack is: the ones going to a higher level are closer to the bolt head, and the horizontal ones are closer to the wing nut. then when the next layer gets added
Slack and play is sometimes nice, we go back around and zap the bolts with the impact.
We add tarps before the thing gets too high.
Safety
This may not be a complete list.
- Ask questions, see something say something.
- We have deburred conduit, but there may still be sharp things.
- Team lift, communication and coordination of the team is important.
- Closed toe shoes recommended
- safety glasses are required. There are a lot of metal shavings that fly from using the impact driver
- The members are sharp and sometimes shear like scisors.
- rough housing is not allowed.
- The bonkers are called bonkers because when the dome moves they fall and could bonk someone on the head. Arrange them so that the cleat is facing down so the 2x4 rests on the member.
- hearing protection is required when impacting. Impact drivers are very loud. It is important to have earplugs on strings because they get removed and put back a lot. Communication is easier without
- Do not put yourself under a part of the dome that is propped up.
- Take frequent breaks.
- You may want to wear gloves.
- Drink penty of water.
- Wear sunscreen.
- Have a big brimmed hat.
- snug fitting long sleeve clothes recommended for sun protection
- less flammable (cotton) clothes if using an angle grinder. or cut off

Techniques, Flow
We start at the top and do a layer at a time. We leave the layer finger tight that is being attached to, and impact before it gets too high.
Starting uphill vs downhill, the dome moves downhill naturally, and possibly in the direction that the bonkers are leaning it to.
The dome also rotates a bit as we lift, so to get the sage at the lowest spot one may have to adjust the dome at the end.
Try not to layout the pattern more than one level ahead.(in a way that confuses the lifters)
the top 5pt yellow star is easy, after the black pentagon, lifting up the side you are working on become important. unbolt one of the bolts that was on the ground. have 3 links together to make a triangle with a new base and two verticals. don't leave a single pole buried into the ground
As they dome gets heavier, we have to prop up a side of the dome to be able to attach the next layer.
complete Triangles on the base can be used as a support. do not leave a single stick dangling down. (they dig into the ground, and jerking them out of the ground is unpleasant)
Starting a layer means tipping the dome., prop up desired side about a foot, then extend both sides a foot, then the middle another foot, then the sides another foot then the starting point will be about 3ft up and verify everything is supported.
If the holes do not line up, the dome is warped (or wrong members) do not yank on members when nut is removed.
It is difficult to run the impact driver on the ground. connect one link ahead. two ahead may be ok if there are extra workers, but it gets hard to move. Connecting one ahead allows the nut holder to drag both poles and verify geometry.
bundling: The pole prepper sets up a bolt vertex to give to the nut jigglers. They connect it to the horizontal member that is ahead of work. The order that we place the layers on the bolt matters, The higher members go towards the bolt head, and the ones that go lower go towards the wingnut. We may stack all of the members at a joint going to the right or left, and it may appear out of order.
The person at the joint is the one that can push and pull and call for other people to move things. get positive consent from that person before moving things, and be sure you understand what they mean before you jerk.
Management techniques
-- this is all about finesse, make sure the dome is liftend and the change is gradual.
look around and review things. make sure environment is quiet so people can communicate.
Do insist on dewarping the dome and verify by sweeping up the next members tonsee if they line up. if they don't, dewarp the dome until it fits.
3 people --
setter will be going in and out of the dome a lot to help move. the setter puts the vertical members on the bolt, and then the horizontal members. tighten the nut quite a bit to reduce slack. this person is outside the dome.
bolter this person has the impact and will be fastening the members up. Inside the dome
pole passer, this person verifies pattern and makes sure poles go on the screw.
4th person, Utility, can layout pattern for the next layer as long as it does not interfere. Bolt fairy: drops bolt washer washer wing groups at each new vertex. This person can also help get tarps staged and come help hold stuff if there is an exception.
5th, next to last layer needs lifters.
6th/7th, last layer this gets hairy.
Put tarp on before it gets too high.
screw into ground, ratchet straps.
tennis balls to prevent gouges.
Fire extinguishers exit signs
Last layer
The bonkers can push the whole dome over. Make them be as vertical as possible.
Slug trail is very dangerous, it also puts a movement force on the dome.
We need about 6 or 7 people at times to help lift and control shifting. Bonkers must be verical.
Song
it stars with a yellow penta starburst in a blue sky, Mopar would be proud. Red flowers with green leafs. it is Christmas in Ukraine
Brown asterisk surrounded by pink sphincter, with silver flower star. with orange leaves. with brown extending to orange. surrounded by a black hexagon.
Black forms the super structure, large 2 member pentagon around the red flower, and a large hex, each side 2 members long. The pattern always has two blacks in line.
at the black intersections Two orange three black one green.
Halloween meets christmas
Tarps
5 tarps across the top.
Entrance
The entrance is across from the stage, and is pointed to by one of the points on the top pentagram. there are a few exposed members around the door to provide sightlines to others.
the brown sphincter is a possible main entrance: an entrance. the stage is centered on a yellow star.
Please make sure the yellow star is on the lowest end of the slope so that the stage can be level and the same height from the ground
There are two triangles cut for emergency exit.
There is a year where the stage is centered on the brown, and the entrance is cut below a yellow star.
In 2024 things led to 2 main entrances and 2 front side exits.
Stage placement
It is nice to have the stairs on the same side as the sound booth, but it makes space tight if there is a videographer It would be nice to have 2 sets of stairs.
If there is a slope, the stage should be at the base of the slope, however sun angles may also be a factor.
Securement
Don't secure until dome is in place and all bottom bolts are tight. there will be a ring all around the base. that can be a tension band.
The matts over the entrance beams can do a lot to hold things down. use stakes in a way that does not trip people.
the orange twist screws can sometimes help, they often screw into the ground near the middle of the member, and use ratchet straps to connect to the intersection.
Often times these don't hold, try another place.
layers
9 layers
layers 8 needs 4 or more and 9 should have 6 or more people
Orientation
Land must be quite flat. Level is also important. Stage should be on the lower end or upper end. Stage is intended to be infront of the pentagon.
Deconstruction
have an angle grinder ready. layers 9 and 8 need a fair team to hold things up, but it can go quickly. you will reattach some bolts on the lower levels. use bonkers to hold things up.
Keel walking area clear of tripping hazarfs
tests and ideas
It is confirmed that the shorter screws are easier to work with than the longer ones, just requires unwarping the dome. 2024
Using the stage as a support for the dome is not quite good enough. It is hard to move away when adjustment is needed, and there is tripping hazard. Make more bonkers. 2024
2026 idea: use cross member on a bonker to limit tipping. This is not guaranteed to be worth it.
More opaque is good for tarps, a thin white tarp makesnit hard to see screens.
Fly for outer TVs and shade structure for stage. The AV equipment should probably be used
It is important to have the stage at the top or bottom of the slope. it makes it easier to make the stage.
Openings
2012 1 entrance
2014 1 entrance
2016 1 entrance 2 emergancy
2018
2024 2 entrance 2 emergency
2026 1 entrance 4 emergency
 4 triangles one hex. 5 total.
4 entrance/exits -- it appeared to work.